
The Last of Us Part 2 has many different collectibles to find and Artifacts are one of them. There are a total of 148 Artifacts in the game to find throughout the game’s story. We have collected all of them and compiled them together into this The Last of Us Part 2 Artifact Locations guide.
The Last of Us Part 2 Artifact Locations
The Last of Us Part 2 does not have chapters in the traditional way. Instead, each one is divided into days. However, we have named the chapters based on what you do in the game and what they are called when you save your game.
Spoilers will definitely be present in this guide, including locations and gameplay mechanics that Naughty Dog hasn’t talked about publically. You should take each chapter at a time. However, we have also spoiler marked each section of the game below which contains heavy story spoilers. So, you don’t have to worry and are in safe hands.
- Jackson
- Seattle Day 1
- Chapter 8 – The Gate (6 Artifacts)
- Chapter 9 – Downtown Seattle (18 Artifacts)
- Chapter 10 – Eastbrook Elementary (3 Artifacts)
- Chapter 11 – Capitol Hill (7 Artifacts)
- Chapter 12 – Channel 13 (1 Artifact)
- Chapter 13 – The Tunnels (5 Artifacts)
- Chapter 14 – The Theater (4 Artifacts)
- Chapter 15 – The Birthday Gift (1 Artifact)
- Seattle Day 2
- Seattle Day 3
- 4 Years Earlier
SPOILER WARNING
Spoiler warning for this section of the game. Do not read on until you have finished all the previous chapters.
- Seattle Day 1 (Abby)
- Seattle Day 2 (Abby)
- Seattle Day 3 (Abby)
SPOILER WARNING
Spoiler warning for this section of the game. Do not read on until you have finished all the previous chapters. The following section of the game begins after the farm.
- Santa Barbara
Jackson
Chapter 2 – Waking Up (1 Artifact)
The first and only artifact in this chapter is found just before you enter The Tipsy Bison bar with Jesse. On the right walkway, behind a truck filled with logs, you can find the Volunteer Receipt document.

Chapter 3 – The Overlook (1 Artifact)
SPOILER WARNING
Spoiler warning for this section of the game. Do not read on until you have regained control of your character in this mission.
Eventually whilst playing as this new character, you will reach a house. After crawling under some floorboards and killing the enemy, look to your left and hop into the second window of the house. Directly in front of you, on the table, you can find the next Artifact.


Chapter 4 – Patrol (6 Artifacts)
The first artifact in this level is found after you and Dina get on your horses for the second time. Dina will point out some houses that you can climb into and scavenge. You want to head to the one on the left. Climb up and open the bedside drawer on the right of the bed to find the Artifact (A Note To Santa) inside.


The next artifact isn’t found all the way until you crawl under the truck and Dina saves you from the Infected. Head inside the door at the back of the store and into the truck. On the cardboard box in the back of the truck, you can find the Supermarket Apology Artifact.


The third artifact is found after jumping into the supermarket. Eventually, you will have to squeeze through a gap with an Employee of the Month board on the other side. After squeezing through the gap, enter the door on your right and look at the table to the right of the safe. Here you can find the Good Boy Combo Artifact, which contains the solution to the safe combination.


Once you get to the library, you will need to break a window to progress and enter Eugene’s workroom. As you exit that room and enter the children’s area of the library you will automatically pick up the next Artifact from the noticeboard, which is Eugene’s Firefly Pendant.

Immediately after the last collectible, you will enter the children’s area of the library. At the back is a bed, with a bedside table next to it. Open that drawer to find the Eugene’s Ultimatum Artifact.


Turn around from the previous collectible and look on Eugene’s desk to find the Photo of Eugene and Tommy Artifact.

Chapter 7 – Packing Up (1 Artifact)
SPOILER WARNING
Spoiler warning for this part of the game. Do not read on until you reach the house back in Jackson.
After you have arrived in the house, head upstairs to the bedroom to interact with the red Shoebox. Doing so will allow you to pick up the next Artifact, which is unmissible and also happens to be Joel’s Watch.
Seattle Day 1
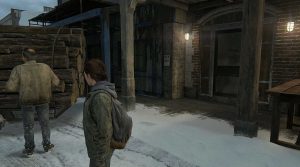
Chapter 8 – The Gate (6 Artifacts)
Once you and Dina have reached the highway, she will point out some trailers on the left. Get off of Shimmer and enter the trailer. In the backroom, open the drawer in the corner to find the Map of Seattle Artifact.


Eventually, you will reach a large gate which has some graffiti on it. To the left, you can find a guard post’s trailer. Inside, sitting on a desk is the Artifact: Refugee Note.


Right behind that trailer, further into the guard post, you can find another one. Sitting inside on the desk again is another Artifact (Infected infographic).


The fourth document is found after Ellie has climbed the wall and jumped over to the other side. Head inside the guard tower and look immediately to your left to find a ladder going up. At the top, you can find the Isaac’s Orders Artifact.


From that last collectible, head downstairs and to the ground level. Enter the trailer in front of you by breaking the glass. Inside, in a drawer next to a keyboard, you can find the Artifact entitled Checkpoint Gate Codes.


From that last artifact, head out the back of the trailer to find a generator. Pick up the cable. The goal here is to aim the cable above the trailer, so that it lands by the gate on the other side. Stand just back from the generator and aim at the location shown below.

Head back through the trailer and climb up the cable. On the roof, sitting on the chair, you can find the Rooftop Note Artifact.


Chapter 9 – Downtown Seattle (18 Artifacts)
Strap yourselves in as this area of the game is the largest in The Last of Us Part 2 and the amount of collectibles reflects that. The first artifact (FEDRA Census Document) can be found in the guardpost’s drawer, right after you dismount your horse and spot the Serevena Hotel.

For the next collectibles, we will use our map to guide where to go. Head to the block along 6th Avenue, between Colombia Street and Cherry Street. This block represents a broken building and in that building, you can find a bag which holds the Cache Hunter Note.


The next three artifacts are all found in Westlake Bank, which is just across from the broken building above. From that block, head South by one block to the one along 6th Avenue, between Chery Street and James Street. Head inside the bank through the opening in the building and make your way to the safety deposit box lockers. Interact with the bag on the floor to find the next Artifact (Bank Heist Plans).


From there, turn to your left and use the code from the artifact above to open the vault ’60-23-06′. On the table, you can find the Bank Robber Letter Artifact.

Next, head to the back right corner of the room to find a deposit locker you can open. Inside is the Antique Ring, which is from Uncharted 4.

The next artifact is found in the middle block between Colombia Street and Cherry Street. This block contains a tank and to the left of that tank is a corpse, with another document: Letter From Isaac.


The seventh artifact in this level is found at the synagogue between Marion Street and Colombia Street. This is a mandatory location you will need to visit in the story. As you enter the gate, turn to your right to find a ladder up to the guardpost. In the first post’s drawer, you can find the Emergency Protocols Memo Artifact.


The next artifact isn’t found until you have progressed into the Synagogue. After you use the rope to jump over to the balcony to exit, enter the door at the end of the balcony. Inside the drawer of the desk is the Rabbi Saunders’ Letter Artifact.


The following artifact is found at the Northmost point of the area, right in the centre of your map. You will come across a truck, with the word ‘Fascists’ written on the side stuck in some water. Open up that back of the truck to find the Note To Informant Document.

The next artifact is found along Madison street in the block closest to the main highway. You will need to go round the back of the grey slate building and climb the stairs to find a document in a bag.


The next artifact is found at the Ruston Coffee Shop, in the North of the area, along 5th Avenue. Break the window and enter the shop to find the WLF Safe House Supply Note Artifact on the counter.


In the Ruston Coffee Shop, you can also find a key for Barko’s Pet Store in the toilets in the back which is another artifact. Then, take that key and head to Barko’s, which is in the alleyway between 5th and 6th Avenue, North of Marion Street. Head upstairs, and as you enter the next room immediately look to your left to find the Join WLF Note on the photocopier.


The next artifact is found along 5th Avenue Between Madison Street and Marion Street. This section has a checkpoint gate, which you can climb up to. After doing so, head to the second guardpost (the one closest to the supply tent) to find the Street Drawing Artifact.

The following artifact is found in the mandatory story location of the Courthouse. This area is unmissable. After entering you will go down to a dark tunnel with some train gates. At the end of this tunnel, you can find the Plea To A Friend Document next to the corpses.


From that last collectible, look to your left and smash the glass of the window. Enter the room and look in the filing cabinet in the back corner. Here you can find the List of Known WLF Agitators Artifact.

Directly to the right of that collectible is a dead body. Grab the machete from it, to cause the Lt. Torres’ Final Memorandum Artifact to drop.

The final Artifact in this level is all the way at the Serevena Hotel after you have the fuel and unlock the gate. Go to the upstairs floor of the hotel and then into the bedroom. Follow it through to the connecting bedroom and then look in the drawer underneath the TV find WLF Recruiter Journal.


Chapter 10 – Eastbrook Elementary (3 Artifacts)
The first two artifacts in this level (Leah’s Note and Leah’s Photograph) are automatically added to Ellie’s backpack after the cutscene ends.
The third artifact is found after most of the encounters and once you reach the roof. After killing the enemies up here, you will need to head back inside to a small room. The artifact (Isaac’s Mandate) is found on the table, next to the radio.


Chapter 11 – Capitol Hill (7 Artifacts)
After exiting the apartment, take the first right and continue down into the street. Eventually, you will come across a brown, brick alleyway on your left. Head down this alleyway and into the open door on the right. Go upstairs, kill the Infected Runner and enter the bedroom with green walls. Sitting on the bed is the Chevy’s Apology Artifact.


The next artifact is found at the motel. To the right is a block of white apartments with a green dumpster next to it. Pull that dumpster out from behind the small blockade and place it against the wall underneath the white apartment with the open door. Climb up into the apartment and look in the drawer in the kitchen, next to the fridge to find the Raul’s Olive Branch Artifact.


The third artifact in this level is found when you arrive at the Gas Station with enemies patrolling. Opposite that Gas Station is a backdoor with a brown wall. Enter that door and take a left at the end of the corridor. Behind the counter, in the next room, is the Artifact entitled Rebecca’s Tip Off.


The next artifact is much further into the chapter after you and Dina come across the three Infected and the explosive traps. Before you slide down the mud, look to your right and climb up the ladder to find the Tower Doodles Artifact on a box at the top.


The next artifact is after you and Dina slide down the mud slope. Eventually, you will come across a giant mural on the wall. To the right is a brown truck. Jump inside the back of it to find the Artifact (Raul’s Account).


The sixth artifact is found in the tae-kwondo studio in the small street filled with explosive traps. Head to the back of the store, the corridor that leads to the kitchen, to find the Artifact (Fran’s Refusal) on the noticeboard.


Head back outside and into the shop across the street. Open the door at the back and look on the noticeboard to your right to find the Thrift Store Reminder Artifact.


Chapter 12 – Channel 13 (1 Artifact)
SPOILER WARNING
Spoiler warning for this part of the game. Do not read on until you have the cutscene where Ellie and Dina find who they are looking for on the top floor.
The only artifact in this chapter is at the top of the station on the same floor as where you find Leah. Head into the room on the left and look by the sleeping bag on the couch to find the Dad’s Pep Talk Artifact.


Chapter 13 – The Tunnels (5 Artifacts)
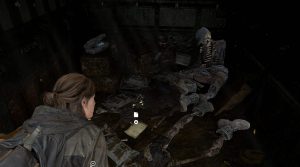
The first artifact in this level is found after the encounter with both Infected and WLF troops. The room has flares scattered around it. Once you have killed them, you will need to enter a set of train carriages. Ignore the exit on the side and go all the way to the end of the carriages. This is a dead-end, but if you turn around, you can find the Subway Note Artifact on the window with the railing.

Much further into the level, after using the chain door, you will enter a tunnel. Enter the room with the blue door entitled ‘Lounge’. There are three Artifacts in here. After entering, immediately turn around to find the Whittled Statue Artifact.


Head to the opposite corner of the room to find the Soda Can Note in the red vending machine, which you can collect by smashing the glass.

From there, immediately turn to your right to find the Locker Room Note on the table.

The final artifact is found at the very end of the level. You will reach a metro station and after going through the first train, climb the red vending machine which is turned on its side. Go into the train car on your right and look at the door on your right as you enter. Pinned on the wall is the Subway Station Note Artifact.


Chapter 14 – The Theater (4 Artifacts)
The first artifact (Program For Cassandra) is found on the ground floor, to the left of the counter.

From that artifact, go up the stairs and turn to your left. Sitting on the table, next to the camp, is the Lone FEDRA Soldier Journal #1 Artifact.

Turn around and go through the door next to the bar. Go through the Projector Room door on your left to pick up the Lone FEDRA Soldier Journal #2 Artifact from the radio.


After finishing everything in the upper part of the theater, you will need to head into the main auditorium. The final Artifact (The Sick Habit Flyer/Set List) is sitting on a black box on the stage.


Chapter 15 – The Birthday Gift (1 Artifact)
SPOILER WARNING
Spoiler warning for this part of the game. Do not read on until you have begun this chapter and finished the introductory cutscene which takes place after Ellie falls asleep in the theater.
This collectible comes very late in the level after you have been separated from Joel in the natural history part of the museum. Eventually, you will come across a large circular exhibit with a stag and some wolves. Look to the left to find a number of connecting rooms. Continue until you get to this crack in the wall, which you can crouch through. In the next room, next to the butterfly exhibit, you can find the Suicide Note document.


Seattle Day 2
Chapter 16 – Hillcrest (10 Artifacts)
The first artifact is found in the third building on the left, the Majestic Laundromat, in the first street (where you begin the chapter). Break the glass and head to the backroom of the store to find the Join WLF Note Artifact on the desk.


Next, head to the second building on the righthand side of the street (Rosemont). Drop down through the hole at the back of the store behind the cash register counter and look to the left of the workbench. Next to the foldable bed, on a small table, is the Artifact (Boris’ Daughter Drawing).


The third artifact is found once Ellie spots the truck riding off in the distance. After jumping down, look to your left and head for the gap in the bushes. Use the dumpster to climb up to the shop and break the glass to enter. Inside, on the central counter, you can find the Need A Plan Note document.


Head back to the main street and look in the shop to the left of the Ruston Coffee Shop (Used & Rare Books). The Yolanda’s Note Artifact is sitting on the cash register counter.


Much later into the level, you will use a dumpster to climb onto a garage. After hopping into the next building, look to your right to find a small side room. In this room, on the desk, is the Condolence Note Artifact.

After exiting the building above you will come across another street with four shops and a bunch of enemies. After killing all the enemies head into the first building on the left, Velvet Tattoo. Hop over the counter and into the back room to find the Artifact (Note in Hillcrest Tattoo Parlour).


Now, head into the second building on the right (Pet Boutique). Smash the windows at the back of the store to enter the employee-only washing area. Next to the sink, you can find the Artifact (Turn in Boris Note).


From that artifact, go back into the main store and through the broken wall, which leads to a pub/dining area. Go to the back to find a kitchen. Upon entering, turn to your left to find the next artifact (Dale’s Combo).

The final two artifacts are in the house you enter after spotting the black smoke and climb the fence into the back garden. The first artifact (Boris’ Confession) is on the coffee table in the living room.

The second artifact in this house is Rosemont’s Flyer, which is on the small side table to the left as you walk to the kitchen from the living room.

Chapter 17 – Finding Strings (1 Artifact)
SPOILER WARNING
Spoiler warning for this section of the game. Do not read on until you have finished the introductory cutscene which happens after the screen cuts to black.
The artifact in this level isn’t found until you reach the spore-infested area where Joel tells you to put on your mask. After jumping into the first hotel’s bedroom, squeeze through the gap in that room and head out of the door on your left. Take another left and enter room 107. The Artifact (Tara’s Invitation) is sat on the toppled over closet right in front of where you enter.


Chapter 18 – The Seraphites (7 Artifacts)
The first artifact in this chapter is found in the first large street. Head to the left side of the street and enter the Kingsgate Brewing Co. building. After killing the Infected, one of the Runners will drop a document which is the WLF Target List.


Next, head to the right corner of the street and go inside the Conference Center. Head into the elevator shaft at the back of the room and climb the ladder to the upper floor. Head to the box where the rope starts and break the glass to your left. Throw the rope over the metal beams so it gets caught on the corner. Jump to that rope and then to the balcony leading to the other room, which is blocked from the side you were just on. The Last Letter to Husband Artifact is sitting in the room on the floor, in-between the two couches.


A little bit further on you will pass through an underpass and find some white apartments on the left. Use the truck in front of them to climb up to the second floor and jump to the balcony that connects to the window. Smash the glass, enter, and head to the bedroom at the back. The Evacuation Letter Artifact is sitting on the kitchen table.


Head out through the door and go to the room opposite. Interact with the workbench in the back to cause the enemies hiding to emerge and attack you. This will open the locked room in the apartment. Sitting right next to the TV in this room is the WLF Deserter Letter Artifact.


The next artifact is found in the Garden Suites 113 building, which is the one you enter after your first encounter with the Seraphites (Scars). You will make your way into some large apartments upstairs, with room 201 being where we will start. Jump out the window and go up the balcony staircase. Break the window to the apartment on this level to find the Dying Husband’s Plea Artifact next to the corpse by the desk.


The next artifact is much later, after you fight the miniboss with the pickaxe. After going down a ladder and dropping into water Ellie will come back up to land. In the distance, you can see Weston’s Pharmacy. Follow the path up to it to find the Pharmacy Note Artifact underneath the cash register, behind the counter.


The final artifact is inside the hospital where you are searching for Nora. After clearing out the enemies on the ground floor, you will need to go up some stairs to the second floor. After emerging onto this floor, go into the first door on the right. The Artifact (Hospital Supply List) is on the countertop.


Seattle Day 3
Chapter 20 – Road To Aquarium (3 Artifacts)
After you and Jesse go diving for the first time, you will come across a parking garage with infected on your left. Go all the way to the back of the garage and climb onto the ramp via the car. Sitting at the edge of the broken ramp is the Garage Note Artifact.


The second artifact is found when you and Jesse drop into the dark bookstore. Stay on the ground floor and head to the far right corner of the store, the corner furthest from the chain gate. On the table in the children’s area is that Artifact (Bookstore Note).

The following enemy encounter takes place in a large open area. Once they are all dead, go into the Rachel’s Fabrics Store on the right. Make you way up to the second floor to find the Textile Note Artifact pinned between the two windows overlooking the combat arena.


Chapter 21 – The Flooded City (6 Artifacts)
The first artifact is found when you reach the locked chain gate. Before opening it, turn to your left and go up the stairs. Take another left to find the Stash Note document sitting by the corpse.

The next artifact is found after Ellie’s boat stops working and you pass the ‘Seattle Sleep Warehouse Building’. Just after you ride over the fence you will see the Carthy Hotel. Head inside to find the Shambler Note Artifact on a corpse on the right.


From the artifact above, continue forward into the next area, where enemies will be shooting. Ignore them and instead take your boat along the left side of the pond/lake. You should be driving behind the train carriages and parking you boat by the land, where the carriages stop. Make your way up the train and throw the rope at the end through the hole in the roof, so that you can jump to it from the open carriage door. Climb the rope up to the roof of the train carriage and then drop down through the other roof hatch. At the end of this carriage is the Sniper’s Note on the seat.


From there, kill all the remaining enemies and make your way up the staircase to the left of the central building. Once at the top, take an immediate left and break the glass. Look to your left again to find the Artifact (Encampment Note)


Continue on until you reach the arcade and have to get out of your boat. Look on the table at the back of the seating area on the ground floor to find the Arcade Flyer Artifact.

Finally, after defeating the Infected in the room beneath where the floor breaks, look in the back corner to find the Prize Zone. Open up the hatch and jump inside. Go up the stairs and turn to your right to enter the PC Cafe. On your left, you can find the artifact (Arcade Note) pinned on the wall.


SPOILER WARNING
Spoiler warning for this section of the game. Do not read on until you have finished the introductory cutscene and gained control of your character.
4 Years Earlier
Chapter 23 – Tracking Lessons (3 Artifacts)
The first two collectibles (Owen’s Drawing of Abby and Thank You Card From Mel) are automatically in your inventory at the beginning of the chapter.
The third artifact is found after you walk through the park. On your right, you will find a gazebo. Sitting on the bench in that gazebo is the Zoo Holiday Brochure Artifact.


SPOILER WARNING
Spoiler warning for this section of the game. Do not read on until you have begun this chapter.
Seattle Day 1 (Abby)
Chapter 25 – On Foot (1 Artifact)
After you and Mel have climbed to the roof of the warehouse and made it back down to ground level with Manny, smash the windows and look in the brown trailer to the left. Here you can find the WLF Gun Cache Note artifact by the door.


Chapter 26 – The Forward Base (1 Artifact)
The only artifact in this level is when you are inside the building after speaking with Nora. Right as you enter, it will be next to the brown box, underneath the picture frame on your right.

Chapter 28 – Hostile Territory (12 Artifacts)
There is an artifact you can grab in the houses with Manny. However, he will take it from you and it doesn’t count to the overall number.
Quite early on into the level you will come across a shop with the name ‘Tang Fabrics & Imports’ on the side. Look to the building to the left and hop into the window. Inside, on the side, you can find the Scar’s Suicide Note Artifact.


Shortly after the previous artifact, you will reach the Chinatown district. Head into the third shop on the left and climb up the stairs. Crawl under the table, kill the infected, and hop across the gap on the balcony. Go up the staircase to your right to find the Artifact (Plea to Serpahite Prophet) on the skeleton.


From that collectible, head back to where you jumped across and follow the corridor to the end. On your right is a room with the artifact on the cardboard box to the right.

From that document go through the door ahead but don’t drop down the hole. Instead, look to your right to find the Strange Relic Artifact on the table, which is an easter egg from Jak and Daxter.

After you leave the Chinatown district you will come across a large mural in the back of a truck. There are six artifacts at this mural in the form of scraps of paper. One of them is in the back of the truck, two are hanging from the left side of it, with another on the ground to the left of the truck. The final two are hanging from the right side of the truck.


From that truck head into the building on the right. The Artifact (WLF Soldier Meets Prophet Letter) is found on the counter.


After you battle the Seraphites (Scars) in the destroyed buildings, you will crawl under some rubble and reach a large open room overgrown with foliage. Turn to the left to find the artifact (Letter From Seraphite Father To Son) on the table in the rooftop garden.


Chapter 30 – The Forest (1 Artifact)
The only artifact in this level is found after the boss fight with the lady who stole your backpack. Eventually, you will enter an auto shop. Head to the back of the room and go through the door in the corner. Look on the table to your left to find the Failed Truce Artifact.


Chapter 31 – The Coast (3 Artifacts)
The first artifact is found on the ground floor of the cruise ship. As you enter from outside, take a right in the corridor and then another right into the room with beds. The artifact (Infirmary Note) is on the bed to the right.


The second artifact is found on the ground floor of the boat after you pick up the crossbow. Head to the end of the corridor on this floor to find the Mutiny Note artifact sitting on the skeleton at the end.


Now, make your way to the top floor of the boat and go to the door at the back. Open the door to find the Ferry Log document sitting by the skeleton in front of you.


Chapter 33 – The Shortcut (6 Artifacts)
The first Artifact (Amputation Supplies) is automatically in your inventory at the start of the chapter.
The second artifact (Survivor Pleais found after you jump over the isles in the river. Once you get across go up the stairs in the building and check the room for a note on the floor.

After you jump from the highway to the apartment balcony, look at the table in the hallway for the third document (Neighbor Exchange).

Further on you will jump over some isles again. Once you enter the phone store ‘Interbay’ look in front of the cash register to find the Scavenging List Artifact.


Further into the level, Lev will hop across some beams. Enter the red door on the left to find the Seraphite Truce Artifact on the desk.


After you take the long elevator ride to the top there will be a note on the wall before you enter the first room.

Chapter 34 – The Descent (3 Artifacts)
Early on you will enter the ‘Orchards Juice Bar. On the pinboard, in the office behind the counter, you can find the Gym Safe Code Artifact.


On the other side, you will enter the exit door. Abby will automatically pick this Artifact up upon squeezing through. It is unmissable.
After you use the firehose to repel down. Look in the room on the right to find the FEDRA Final Note document.


Chapter 35 – Ground Zero (5 Artifacts)
After you split up from Nora, walk to the next staircase. Before you go down, crawl under the rubble into the dark room on the right. The Artifact (Annex Letter) is by the corpse.


Now, go down the staircase and drop down to the lower floor. As you land there will be a revolving door with a corpse. The Soldier’s Letter document is sitting in the bag next to the corpse.

From the last artifact, turn around and head into the Chapel. The Artifact (Chapel’s Note) in on the central altar.


Progress forward through the yellow door and the quarantine tunnel. In the following area, smash the windows of the second room on your right. Inside, you can find the Patient’s Note Artifact on the stretcher.


Shortly after, you will squeeze through a gap in-between two doors leading to the surgery area. The Artifact (Doctor’s Note) is in the 2nd room on the left, on the counter.

Seattle Day 3 (Abby)
Chapter 37 – The Marina (1 Artifact)
After going through some water, you will arrive at a pier. Walk past the ladder and enter the shop on the right at the end. The Marina Note Artifact is on the counter.


Chapter 38 – The Island (4 Artifacts)
The first artifact (WLF Scout Journal) is found after you climb the first ladder. Look to the right to find it on a corpse.

After passing the waterfall you will come to a hut. Inside the big one at the front, you can find the Venison Distribution Note Artifact on a table.


The next artifact (Mournful Prayer Note) is found after you spot Isaac’s ship and pass the two enemies. On your right, there will be a hut. Inside, you can find it tucked on the right side of the shrine.


Now, head to the hut opposite. On the bed along the left, you can find the final Artifact (Young Seraphite’s Journal).

SPOILER WARNING
Spoiler warning for this section of the game. Do not read on until you get to the chapter after the farm.
Santa Barabara
Chapter 42 – 2425 Constance (1 Artifact)
As you walk down the street, you will see a cream/light green house on the left with some Infected. Head inside and look in the bathroom to the left. Sitting on the toilet is the artifact.


Chapter 43 – Pushing Inland (3 Artifacts)
The first artifact is found right at the beginning of the level. It is to your left, inside the boat.

After you climb over a fence and into the housing estate, go inside the garage of the first house on the right. The Mansion Note Artifact is in there.


Once you reach the building with the Clicker on the roof, jump inside and head downstairs. The Runaway Warning Artifact is in the kitchen on the central counter.

Chapter 44 – The Resort (2 Artifacts)
The first artifact in this chapter is found after you go through the train carriage compartment and climb a ladder. You will see some prisoners being escorted in the distance. Stick to the left side as you jump down to find a blood trail with a corpse. Next to it is the Artifact (Santa Barbara Slave Note).


The final artifact in the game (Rattler’s Letter Home) is found in the second large enemy encounter within the resort. As you continue along the story path you will reach a white spiral staircase on the left side of the room. Scale it and take a right to find the Artifact on a nightstand, near the bed and lamp in the corner.

The Last of Us Part 2 is available now on PS4.