
The Sunken Valley is a large, linear area that is found by the Old Grave Idol in Ashina Castle in Sekiro: Shadows Die Twice. This walkthrough will show you all of the items, enemies and a very special hidden secret.
Sunken Valley – Under-Shrine Valley
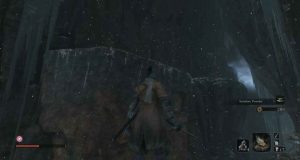
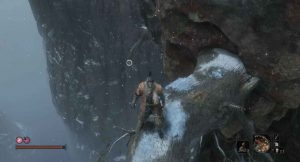
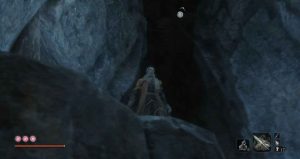
From the Under-Shrine Valley Idol. Turn around and look across to the cliff. Jump across and kill the two gunners. They are a little stronger than your regular grunt gunners. However, you can break them out of their attacks and kill them quite easily.
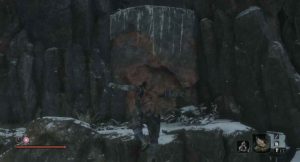
From there you want to hop up to the ledge you can grab onto.
Hug the wall, drop down and kill the last gunner on the right. You are actually back in the Ashina Outskirts. However, this area is only short. Opposite the gunner next to the rock structure you will find a Prayer Bead. A Pacifying Agent can be found just past there.
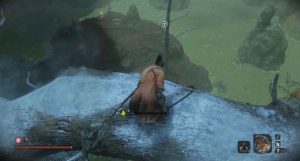
Now head into the water at the back. On the right side, behind some ice, you will find another Pacifying Agent.
That is it for this area, head back to the Idol.
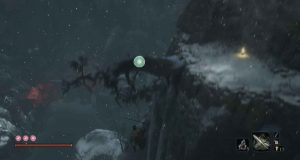
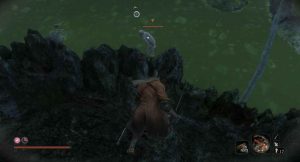
On the cliff edge ahead you will find a Fistful of Ash. Across from that is another gunner. You can grapple across and kill him. Head through the main path and grapple across to the other edge via the two tree branches. After killing the gunner, head up to the left alcove.
Up here, on the right, is another gunner. Take him out and grapple up to the cliff above you and kill the other gunner. Jump up the cliff to the small hut above. Here you can find a Gourd Seed and some Yellow Gunpowder. The latter is only found in the Sunken Valley and is used to upgrade your Prosthetic Tools.
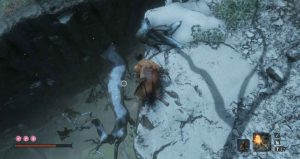
Head back to the main path and go right this time. Below, you will find a Ceramic Shard. Grapple across and kill the lizard below you at the end of the cliff. You can pick up an Antidote Powder there. Now, shimmy along the wall.
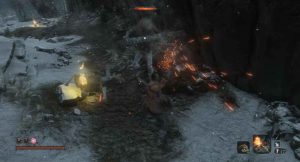
Down in this area are two gunners of the type you have already faced and one gunner with a large weapon. This is a shotgun. The gunners you have faced before should be your first priority. They are both on the right. One is by the fire and another is further back. Rush them and try to dodge their fire.
In the middle, next to the fire you have the shotgun enemy. He has a lot more posture than the other two and will already be alerted to you. You want to Attack a couple of times and deflect. Whenever he is prepping to fire, dodge twice to the side to avoid the shot.
On the right, where one of the gunners was you can find some Scrap Magnetite. To the left is a man you can talk to who will warn you about the Gun Fort, as well as a Sculptor’s Idol.
Sunken Valley – Path To The Gun Fort
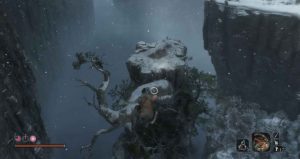
This next bit is a gauntlet. You will want to run and grapple during this first section. Jump off of the bridge and grapple to the branch attached to the rock below. Then run and grapple to the second rock on your left. Then, grapple up to the cliff just ahead.
Here you will fight a mini-boss: Snake Eyes Shirafuji
She is quite difficult as her attacks are relentless, meaning she can easily break your posture.
If you charge her at the beginning you can get a couple of hits in on her. Bring the Firecrackers Shinobi Tool with you.
If she spins with the weapon behind her and the Perilous symbol appears, you want to jump back and out of the way as this is a grab attack.
If she kicks you, she will follow up with a shot from her gun, which can be dodged by stepping to the right. She can also fire her weapon at any point. This can be dodged or blocked. I prefer to block it as it can be a little unpredictable.
Any swings with her weapon can be deflected.
The key thing with her is to attack when she is finishing up an attack. Thereby, you can decrease her posture. This fight took me a while to get down. Use your firecrackers quite a bit to get her to stop attacking.
Once that is finished you will get some Scrap Magnetite and a Prayer Bead.
On the ground to the right, you will find a Fistful of Ash. Below the cliff on that side is an Antidote Powder and a gunner. Head up the left side and hug the wall to progress. Now, sprint across the bridge and jump over the gap about two-thirds of the way along. Grapple to the branch on the right. You are safe for now.
Wait for the enemies to lose sight of you. Now, we are going to kill them from the ledges. Hop up the first cliff and then turn right. Hop up that cliff and hand onto the edge. From the ledge, take-down the sniper. Climb up the next ledge and takedown that sniper. You can pick-up some Scrap Magnetite here.
Head back the other way and grapple along the trees and hang on the cliff. Takedown this sniper. Fall back on the branch and look to your left. You will see a grapple point that will pull you to another point.
Jump, grapple to it, then grapple to the branch ahead before you fall into the abyss. From there, grapple up to the cliff edge above and then climb the wall ahead. Up here is a Gokan’s Sugar.
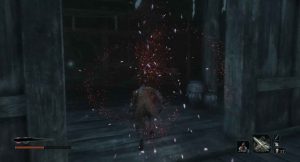
Right above you is one of the enemies with a makeshift shotgun. Climb up the wall and perform a takedown on him. Patrolling the hallway to the left is a woman holding a candle. Wait till she heads up the path and quickly kill her.
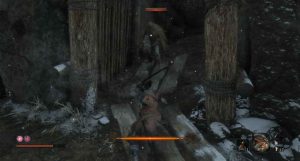
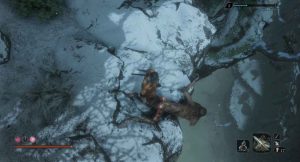
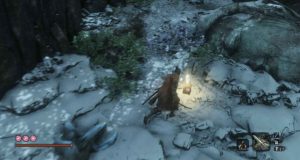
Up this path are two more enemies with a shotgun. Try to get the one by the far wall’s attention. Bring him down to where you killed the last shotgun enemy and kill him in combat there. Above where I am in the image below, on the left you can grapple up to a cliff. Up here is some Ungo’s Sugar.
We are going to leave the second guy for now. Head back outside.
Stick close to the rocks on the left and pick-up the Black Gunpowder. Hop up to the sniper on the overlook above you. Hang from the ledge and perform a takedown on him.
Head back to the path and watch out for some mines along it. They won’t hurt you; however, they will alert others to your presence.
Continue along and grapple up to the top level to kill the gunner and pick-up some Scrap Magnetite. Finally, kill the gunner beneath you. Next to him, you can find some Black Gunpowder.
The last thing to do here is head into the main cave area and kill the final shotgun enemy. On the wooden overlook in this area, you can pick-up some Snap Seeds. Beneath that are some Pellets, some Yellow Gunpowder, and a Heavy Coin Purse.
Head through the cave to find a Sculptor’s Idol.
Sunken Valley – Gun Fort
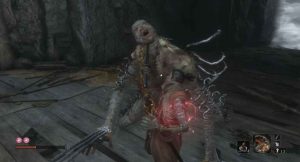
The Gun Fort is a fairly short part of the Sunken Valley. Below the Idol, to the left of the bridge, you can find some White Spirit Emblems. Climb back up and head into the next room which holds a mini-boss: the Long-arm Centipede Giraffe.
This ugly monstrosity attacks rapidly and consistently. The majority of the work will be to deflect his attacks, filling up his posture bar. It takes deflecting all of his attacks three times to stun him. Bring the Firecrackers Shinobi Tool with you.
As I just mentioned, try to deflect as many of his attacks as possible, without filling your own posture bar.
If he bends down and the Perilous symbol appears he is about to perform a sweep attack. You will want to jump over that.
He will not stagger on your attacks, which adds to the difficulty.
Overall, there isn’t much to this fight other than deflecting and dodging his sweep. It will take a few runs, but eventually, you will have the pattern down. Once you defeat him you will get Prayer Bead and some Yellow Gunpowder.
On the altar in the centre of the room is the Large Fan Prosthetic Tool, which when fitted on your arm will cause enemies nearby to be sent flying. To the right is some Scrap Magnetite.
Don’t head through the door yet, instead, you want to drop through the hole in the floor, just to the left of the altar. Beneath here is some Yellow Gunpowder. To the right of where you dropped down, you will find a pathway.
When you crouch for the second time you will reach a split. On the right is nothing and can be ignored. If you head left there is a way out. Look to your left and up to find a platform up high. Jump and grapple to it. Along this path is a Mibu Balloon of Soul.
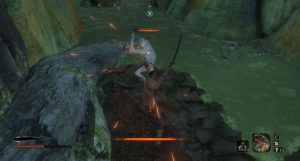
Head back down, and go right this time. Inside the cave on the left, you will find an unfathomable amount of lizards which you can jump and kill. At the back is a Divine Confetti.
Head back out and grapple to the platform to the left. There is another grapple point just below you on a cliff, which you should fall to. Down here are some more lizards and smaller, easier versions of the mini-boss you just fought. I would take on the enemies on the ground first. Dodge the Lizards breath and jump and kill them.
On the ground here you will find a Prayer Bead and a Contact Medicine. Now, head back up to the door in the Gun Fort. To open it you will need to pick up the key from Lord Kuro’s room, just next to where he stands.
Now, you can run across the bridge, as there is nothing on this side.

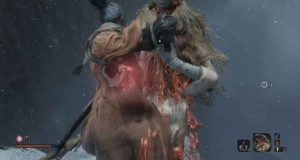
I was kidding! The giant snake is actually back. You will fall into a large lake and the snake will start attacking you. The idea here is to run across to the opposite side of the lake and into the alcove on the left. However, the snake will start attacking you. I found the best way to dodge his attacks is run to the left when the Perilous symbol appears.
If you do die resurrect and keep pushing left and into the alcove. Once you are there he will go away. There are no items in the lake. So, you can rest at the Sculptor’s Idol.
Before we head into the next area travel back to the last Idol as there is actually an item up the top. If you look to the right of the broken bridge and jump off the cliff you can grapple to a branch. On the ledge are some Snap Seeds.
Ok, now you can head down the lake and continue on.
Sunken Valley – Riven Cove
If you look above, you will find a grapple point that will pull you to a ledge with some Adamantite Scrap, which is used for Advanced Prosthetic Tool upgrades. Head up both of the cliffs to the area with the large statues in front. If you walk forward a monkey will jump down. these are the main enemy from here on out. A couple of attacks or deflects will easily allow you to perform a deathblow.
Now, I am going to ask you to do something odd here. Ignore the entire area in front of you and look down. To the right, you will see a tree branch far beneath you. Jump off the cliff and grapple to it when the icon pops up.
Grapple to the floor from there. This area is a side area; however, you can get some important items. On the way down you will get some White Spirit Emblems. Beneath them is an Ungo’s Sugar. Then, just ahead you will find a Memorial Mob Shop.
The water here is poisonous, so try top hop through it or run through it. The shop doesn’t have much of use except a Green Mossy Gourd. This will refill upon resting and reduces poison buildup. It is very useful and should be bought.
Do not go up the path ahead just yet. Instead, we want to head right. Up here is a stronger monkey enemy. It is a tough fight. The best tips I have are to deflect as much as possible and use the Firecrackers Shinobi Tool to stun it, allowing you to land a few hits. When you beat it you will get some Yellow Gunpowder.
In the middle of the swamp in this area, you can find some more Yellow Gunpowder. At the very back of this section is a Heavy Coin Purse. Now head back to the Memorial Mob Shop. We are going to take on the left area.
Before rushing out into the middle, head left and sneak up to the monkey and kill him from behind. He would have been a pain otherwise. You can find a Mibu Balloon of Soul back here as well.
Head back to the Memorial Mob Shop and grapple up to the branches along the right side of this area. On the landmass below there are four gunners and another stronger monkey. The tactic here is to grapple to the tree and kill the two gunner monkeys on the right side.
Once they are down, run all the way back to the Memorial Mob Shop and jump on the tree branch. If you crouch the gunners will lose sight of you and the stronger monkey should walk underneath you. Once he is close, jump onto him and kill him with a stealth deathblow, earning a Yellow Gunpowder.
You can then run up and kill the final two gunners. On this platform, you can find some Scrap Magnetite. In the swamp, to the right, you can pick-up a Light Coin Purse.
Now, we are going to head down the main cave which is where the snake lies. On the right side, you will find some Antidote Powder, as well as an enemy who comes out from the wall. Now, you can kill them; however, they are annoying and don’t offer anything upon death.
Onwards you will find three lizards and another wall enemy. When you reach the point where you have to crouch after passing the snake’s body you will come across around five lizards. Try to kill them all, avoiding their breath. Where you have to crouch you can pick-up a Fistful of Ash. On the right of the snake’s body, you can find another wall enemy and a grapple point.

Grapple up there to find some items: a Fistful of Ash, some Scrap Magnetite, and a Pellet. There are two wall enemies up here, but just grab the items and drop back down. On the left of the snake’s body, you can find one more wall enemy, with another two above him.
When you hop up to the second level, turn around and grapple to the rock. Turn around again to find a Scrap Magnetite piece up ahead.
Now, head forward to progress. You will once again meet the Snake. Jump down to your left to find a platform. Up ahead is a monkey cowering in fear as well as some White Spirit Emblems. What we want to do is get behind the Snake’s head and into the room.
The only way I have found this too work is to grapple up to the snake and stick to the middle of the bridge. Once you get hit, rush on past him, before his head settles back down. If you get hit a second time, resurrect and head into the building.
Inside is a Dried Serpent Viscera, which will be used later on in the game. To the left is a Mibu Balloon of Soul. Opposite that item is a grapple point above you. Loop around to find some Divine Confetti. Then grapple up above you once again to enter the Ashina Depths.
Ahead is a Sculptor’s Idol. We will come to this area later on. Travel back to the Riven Cove idol.
Head back to where you killed the first monkey and grapple along the hands of the statue. One monkey from the bridge will jump onto the statue’s hands further on. Follow him to the fourth hand and kill him. Grapple back to the bridge and kill the two monkeys on the opposite cliff. Next to the bridge, by the head, you can find Pacifying Agent.
Up the cliff, next to you is another monkey. Jump down the other side to kill the monkey and pick up some Snap Seeds.
Now, continue along the main path forward. Once you reach the fourth hand of the statue. Jump down to your left and take on the Moonjar enemy. Another one will be behind you with his fire shurikens. You should be able to kill the one sitting down before he threatens you. On the other side of where that Moonjar enemy was sitting, you can find some Scrap Magnetite.
Across the way, you will see a lot of monkeys. A lot of them. But, we will deal with them later. Instead, turn around and head behind the statues you just climbed on. You can find some White Spirit Emblems in the lap of the first one. Just ahead are a couple more monkeys. Behind them is another Contact Medicine.
If you jump down to the lower statue below you, you can find another Moonjar enemy and a Contact Medicine.
Grapple up to the next platform and drop down to the base of the statue in front of you to find an Ako’s Sugar.
Now, head back to where you fought the previous Moonjar enemies. We are going to take on the monkeys. Grapple across to the branch and turn around, across the gap is an Ungo’s Sugar.
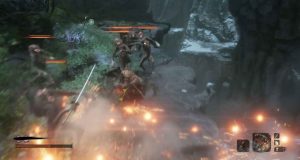
Grapple up to the lower section of where the monkeys are. You can pick up a Pacifying Agent. This is where we want to fight the monkeys, as it blocks you from most gunfire. Equip the Firecrackers Prosthetic Tool. This is key to defeating them. Once you get their attention, use your firecrackers and attack them. Try to avoid doing deathblows as this wastes time.
When they stop being stunned, use the Firecrackers again until you have them all defeated. This looks intimidating, but it is actually pretty easy. You may get some Monkey Booze from killing these guys. You can give it to a select few characters to get them to reveal some information about them and their lives.
In the back corner, you can find some Scrap Iron.
Jump along the statue’s hands and across the small ledge on the next one. Drop down on the other side to the Mibu Balloon of Soul. Up top is the Sculptor’s Idol
Sunken Valley – Bodhisattva Valley
In the arena down below you can see the Guardian Ape. You can read our boss guide on how to beat him here.
Once you defeat it, you will get the Memory: Guardian Ape which will increases your attack power. You will also receive the Slender Finger Prosthetic Tool. When equipped this tool can pull enemies towards you and away from others. It will also enrage beasts, causing them to turn on their friends.
Through the cave, you will find the Lotus of the Palace which concludes this area. However, be sure to head back to Lord Kuro’s room and give him this Lotus. He will give you the Immortal Severance Scrap in return. Finally, talk to Emma.
I hope this walkthrough was helpful. We now have a walkthrough of the Abandoned Dungeon up. You can check out all of our Sekiro coverage here.