
The Hirata Estate is the first main area of Sekiro: Shadows Die Twice and it has a lot of things to do, including a lot of things to miss. However, this walkthrough will show you all of the secrets and items you can pick up. You can access this area by speaking to the old woman in the Ashina Outskirts and using the bell on the sculpture in the Dilapidated Temple.
Hirata Estate – Dragonspring
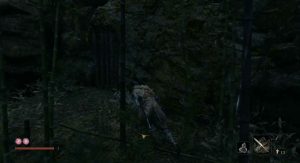
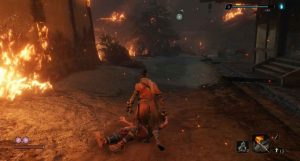
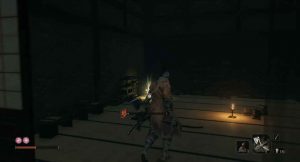
When you spawn in, immediately turn around to find a Pellet behind you. In front of you is a Sculptor’s Idol. Jump off of the cliff and grapple to both the branches, before dropping to the floor. Directly in front of you will find a Fistful of Ash. Now, you can talk to the wounded man on the floor for a bit of lore.
From there, grapple down to the bridge. Turn to your left to find some Dousing Powder behind some barrels. This will reduce burn buildup when hit by fire.
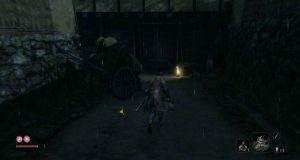
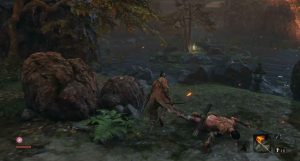
Now head to the left, through the gap in the wall and hop down to the shore. Behind the rock is a Treasure Carp Scale which can be used at a certain merchant in the Hirata Estate. Now, head up onto the bridge and kill the enemies who are patrolling it.
Before heading up to the gate, jump into the water on the right. The shore has a couple of enemies you can defeat. Inside a boat, you can pick-up a Mibu Possession Balloon. Now swim across the water to the small island in the distance.
On the right, you will find Pot Noble Harunaga. He is a merchant and will only accept the Treasure Carp Scales. You won’t have a lot of these right now. On the left of the island is a Light Coin Purse.
Head back to the shore and up the stairs to kill the three wolves and the guard. Grapple over the large gate to find one enemy walking towards you. You can kill him easily. On the right is a Sculptor’s Idol, as well as a Ceramic Shard.
Hirata Estate – Estate Path
That enemy that you just killed will respawn and you will have to kill him again. He will be joined by two archers who will shoot fire arrows at you. Pull the swordsman all the way back to the Idol and then run up to the other two, dodging their arrows. Next to the guy further back will be a Fistful of Ash.
If you jump over the left side of the wall you can find a White Spirit Emblem and an Ungo’s Sugar further back. Now, head to the right side.
This section houses a couple of enemies. On the right side, behind both huts, you can find an Ako’s Sugar. Inside the left hut is a Pellet with an enemy waiting to ambush you to the left.
Now, grapple over the gate behind that hut. This area has a lot of enemies and items. We will deal with the enemies first. One guard and his wolf will patrol underneath you from the tree. Try to jump onto the enemy from above.
A second wolf will come out from behind the wall. Now, head to the left behind a few buildings. Hop onto the roof and kill the archer. Now jump down and murder the group by the fire. Another enemy and a wolf at the end of the path will then start attacking you, so be sure to back up if you are in danger.
Head behind the houses on the right and kill the remaining two enemies. By a tree is a Ceramic Shard. Return to the main path, you will find a Pellet next to the last house, some Dousing Powder on the left, a Mibu Balloon of Wealth on the right, and the Flame Barrel on the fire itself. This Prosthetic Tool can be installed at the Sculptor in the Dilapidated Temple. It will create the Flame Vent Prosthetic Tool which will shoot out a burst of fire. Finally, on the left, you can find a Fistful of Ash.
Head up the main path and kill the single enemy. You can speak with the man up ahead. Take a left and head down to the door. This will open up the locked door from earlier. Next to it is Gokan’s Sugar. This will reduce the posture damage taken for a limited amount of time.
Head back up the path, away from the Sculptor’s Idol. Take a left through the open door. On your right are two giant roosters. They are the worst enemy in the game. Dispatch of them easily with your sword. There is another terrifying rooster on the left, just by where you walked in. Behind the building on the left are another two creepy roosters. On the roof, you can pick up a Heavy Coin Purse.
You can pick up a Pellet on the right side of this side area and an Ungo’s Sugar in the building on the left.
Head back to the main path and enter the right area this time. There are two enemies on the right to kill, with another in the back left corner. Inside the left building, you can pick-up a Light Coin Purse. Open up the doors on the right structure to collect the Shinobi Axe of the Monkey Prosthetic Tool. Taking this to the Sculptor will unlock an Axe for your left arm, with that you can break shields.

Make your way back to the main path and continue up it, killing the enemies along the way. I recommend you go back to the Idol and restore you Healing Gourd. Also, buy the Miriki Counter Skill as it is incredibly useful in the next area.
Before heading all the way up the path, jump over the wall on the left to find a Man who you can talk to. Grapple over the small gate opposite the house to find a Bundled Jizo Statue. Now head back to the main path and hop over the right wall. Here you can find a person to eavesdrop on and two people to talk to. One of them will give you an Antidote Powder.
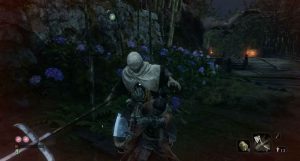
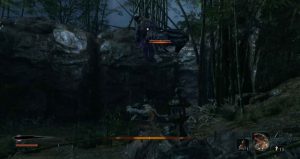
The next area has a couple of grunts and a mini-boss. Take out the grunt who is nearby with the torch from behind. Now, sneak up in the bushes on the left and take out the second grunt once the enemy with the spear is at the far end. That should cause the other two enemies to see you. Head back to the bridge and kill them from that general area.
The only enemy left is the enemy with the spear. Sneak up to him using the bushes and backstab him to remove one of his healthbars. The Shinobi Hunter Enshin of Misen is not too hard if you have the Miriki Counter Skill. Any sweep attacks with the spear should be dodged. If he attacks with a thrust attack and the unbreakable icon appears you can hit circle to counter it, so long as you have the Miriki Counter Skill. Other than that, just attack and deflect as normal. You should have his second healthbar down in no time.
Defeating him will grant you a Prayer Bead.
On the right of this area is a Pellet with a Mibu Possession Balloon next to the open gate in the centre. Just ahead is a Sculptor’s Idol.
Hirata Estate – Bamboo Thicket Slope
Head up and grapple up to the left. Once both of the enemies have passed you, jump down and kill them. Doing this will cause an archer to shoot you; however, you can quickly rush him.
From that archer, grapple up to the cliff above to collect some Dousing Powder.
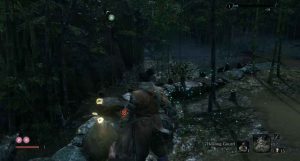
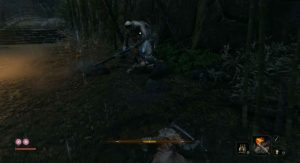
Hop back down on the other side and grapple to the tree branch. From there jump up to the two enemies and take them out. The next section has a lot of enemies. There is one swordsman and a few archers. Try to get the swordsman’s attention with a Ceramic Shard and stealth kill him. For the archers, you should rush them and just try to dodge and attack as much as possible. On the ground next to them, you can pick up some Oil. This will make enemies more vulnerable to fire-based attacks when they are hit with Oil.
This bridge area is another tricky one. Walk up to it and get everyone’s attention. None of them will follow you except the large enemy with a mace. You are going to want to pull him back to where you fought the archers. The best way to deal with him is to dodge as much as possible. Try to attack him as he recovers so that he will enrage. When he does he will swing the mace randomly. You want to back up. This will lower his posture a lot.
Just keep hammering away till you get him.
Once he is dead head back to the bridge and kill the remaining enemies. You can break the shields with your Axe Prosthetic Tool.
Once they are dead, with your back to where you fought the archers jump off of the bridge’s right side. Then grapple up using the low-down branch. At the end of this path, you can find some Contact Medicine. This will inflict a weak poison on you, making you more resistant to poison. To your right is a pathway covered by some Bamboo Shoots. Swing at them to cut them down. Head through and climb the wall at the end.
At the top of this area is another mini-boss. He only has one health bar; however, he is very tricky. You can try to defeat him. But, if you run up the stairs and interact with the door you can get the Mist Raven’s Feathers Prosthetic Tool. This tool can be installed at the Sculptor and will turn you invisible for a brief moment.
If you want to defeat this guy bring the Firecracker Prosthetic Tool with you. This is helpful as it will stun him for a while and allow you to get a few hits in. I recommend upgrading your attack twice before attempting this as his posture goes does quite quickly.
You want to use a 50/50 mix of dodges and deflects. For his normal attacks deflect, except when he jumps into the air or is about to stomp his foot. These attacks deal a lot of damage and will stun you if you block them. Dodge those attacks to succeed. He can be a tough fight. However, it is about positioning and dodging as much as possible.
Beating him will give you some Scrap Iron.
Now, head back down to the bridge. You will find a Fistful of Ash, just next to where the enemies were. Up the stairs, you will enter a story scene. Talk to your Father The Owl to get the Hidden Temple Key, which is needed later on.
Once that scene is finished, grapple up to the tree on your left.
From there, go up to the roof and then back down to the small shacks on the cliff edges. At the bottom, you will find a couple of enemies. One is patrolling and another is in the back with a bow. Take them out however you wish. Inside the outcrop in the rocks are two more enemies to take out. Further down the cave, you can find one more enemy.
Before you leave, head back to the hut and on the left side, you will see a path. Down here are two spear enemies. My best tips are to use the Miriki Counter skill when they thrust towards you and try to split them up as much as possible. There are no other enemies here. Once you defeat them you will get a Bulging Coin Purse. Down in the arena, you can find some Pellets and a Mibu Balloon of Soul. Head back up and go through the cave.
At the end, you can scale the wall. Doing this will allow you to progress. Directly next to where you come up from is some Oil. Then, just around the corner, you will find a Sculptor’s Idol.
Hirata Estate – Main Hall
The Main Hall is another challenging area. Around the corner from the Idol, you will find one lone archer. Take him out easily and the in the distance you will see a bunch more enemies. The best trick here is to run up to them and then run all the way back to the corner. This will hopefully split them up a little, with a couple of enemies following you and the rest hanging back.
Keep doing this until they are all dead. All of the enemies are types you have faced before; so, you should know how to fight them.
Once they are dead, head inside the building on the right. In the first set of rooms, you will find some Dousing Powder. In the second set of rooms, you will find some Divine Confetti.
Head back outside. On your left, you will see a pathway leading to a body of water. On the island in the middle, you will find some Ceramic Shards.
Go left and enter the building. Kill the two enemies inside and pick-up the Light Coin Purse.
All we have left are the massive group of enemies in the far back of the area. This fight is hard. You have swordsmen, shields, archers, and a mini-boss to deal with. For this fight, I recommend upgrading your vitality and posture twice and upgrading your attack at least once. Bring the Flame Vent Prosthetic Tool with you as well.
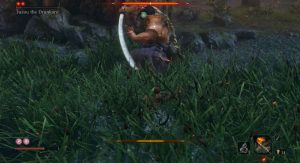
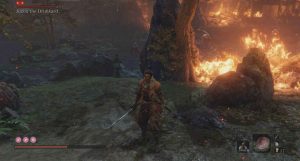
The Tactic for this fight is to draw the mini-boss: Juzou The Drunkard away from the other enemies into the grass and water in the centre of the area. You can then interact with the man who will help you fight him. This tactic is helpful, because the man can distract Juzou, leaving you to get some attacks.
Stand out in the open near the left building to try and grab his attention. Once you have done this he will walk over towards that building. When he is far enough away pop out from the grass and get his attention. He will then run over to you. Once you have his attention speak with the man and mash cross to speed through his dialogue.
Now, you are fighting him. Juzou is incredibly difficult. His attacks are wide and deal a lot of posture damage when you deflect. He can also spit poison at you and coat his sword in poison, which will in turn poison you if you get hit or block his attacks.
His normal slash combo should be deflected as it is easy to time your parries. Any overhead slashes can be parried if you have half a posture bar remaining. If not, dodge to the side. If he stomps and lunges you should dodge backwards. Any unblockable attacks should also be dodged.
You are going to want to let the Man take the biggest beating here. This will allow you to complete the first phase by attacking from behind. You should deal enough damage between both of you to deplete his healthbar once.
Use the exact same tactics for the second phase. If the Man dies you will need to rely on your parries and dodges. You can also use your Flame Vent Prosthetic Tool here to stun Juzou for a few seconds.
You should be able to get him with this method. Defeating him will give you an Unrefined Sake, which can be given to the Sculptor. You will also get a Prayer Bead.
The rest of the enemies can be fought quite easily. Just be mindful of your positioning as there are a lot of them.
Head inside to the building Juzou and the other enemies were guarding. On your left, you will find some Dousing Powder.
A little further up is some Pellets. There are two enemies in this corridor, which can be taken out easily. In the back corner, you can press yourself up against the centre wall by the oil to find a bunch of items including a Mibu Balloon of Wrath, Divine Confetti, Light Coin Pouch, and a Prayer Bead inside a Chest behind a paper wall.
Head back to the entrance and go up the right side. At the end is where you can progress. But, first, go to the left corner of this set of rooms to pick-up a Mibu Balloon of Soul. This will increase the amount of charge you get for your resurrection.
Just up from there, you will find a woman you can talk to along with a Sculptor’s Idol.
Hirata Estate – Hirata Audience Chamber
The next area is the last one of the Hirata Estate. As you approach the end of the corridor an archer will pop out, simply kill him. You can then talk to the man to get some Snap Seeds, useful items for the next boss fight.
Interact with the Tatami ahead and head down the stairs to the boss fight.
This fight against Lady Butterfly is an endurance fight. You can check out our boss guide on how to beat her. Once you do beat her you will get the Memory: Lady Butterfly, which can be used to upgrade your attack power, and the Sakura Droplet, which will give you an extra resurrection.
Hirata Estate Revisited
You can actually come back to a different version of the Hirata Estate later in the game. To see how to get here follow the Purification ending in this guide from Powerpyx.
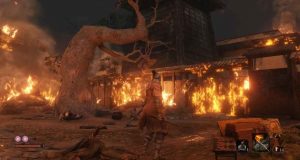
You will spawn halfway through the Hirata Estate area. There is nothing new behind where you spawn, so you can head up the steps. In the courtyard ahead, you will find a mini-boss: Lone Shadow Masanaga the Spear-Bearer. This fight is almost identical to all the other Lone Shadows you have faced up until now. However, if he stands still and holds his fingers to his mouth, you want to attack him. This will stop him from calling in some wolves, which are a hassle. He always opens this fight with this whistle. Other than that you can take him on as normal. Killing him will grant you a Prayer bead and some Adamantite Scrap.
This next area has two archers and two large enemies. One has a mace and the other has a large shield. Kill the first archer and pull the enemy with the shield as far away from the other enemies as possible. Try to hide from the enemy, and when he turns around, sneak up behind him for a stealth deathblow. Then, take out the second archer and the mace-wielding enemy.
Head down to the Sculptor’s Idol by the burning houses.
Here you can find an archer and a large enemy with armor and a mace. Take out the archer, and sneak up behind the larger enemy for a stealth deathblow.
In the middle of this courtyard, you can find a few enemies sitting down, as well as a Mibu Balloon of Wealth.

On the rooftop above, you can find three of the purple-armored enemies. The goal is to split them up and fight them in the corner, by the Idol. This will stop them from seeing you.
Once all three are down, you can find some Adamantite Scrap on the roof. Continue through the area and kill the enemies in the building on the left. In here you can find an Ashina Sake and a Light Coin Purse. Head back to the grass in the middle and sneak around to the right to kill the archer.
The next area has one of the purple enemies and a mini-boss Juzou The Drunkard. Try to sneak up behind the Purple enemy and stealth attack him. If you cannot do that run back to where you fought the enemies who were sat down (shown below).
You want to hide behind a rock so that Jozou will lose you. This can take a while, but be patient and wait until he returns to his starting position. You can then take on the purple enemy as he will still be attacking you.
You can then sneak around the left and stealth attack Jozou. Other than that, deflect his attacks and attack him as he is in-between attacks. Defeating him will grant you a Prayer Bead. On the floor, you can find a Fistful of Ash and some Adamantite Scrap.
The next area has a few grunts, you want to head left and pull the spear enemy into the courtyard. Kill the archers at the back and the second spear enemy. Along the left path, you can find some Fulminated Mercury. Head forward and pick up the Pellets in the room, activating the Sculptor’s Idol afterwards.
Head down the stairs to face off against a new boss: Owl (Father). You can see how to defeat Owl in our boss guide here. Defating him will give you the Memory: Foster Father and the Aromatic Flower.
That concludes the Hirada Estate. You can see our full walkthrough of the Ashina Outskirts area for all the loot and secrets there.
You can find our complete Sekiro coverage here. We will have many more guides releasing in the coming days.