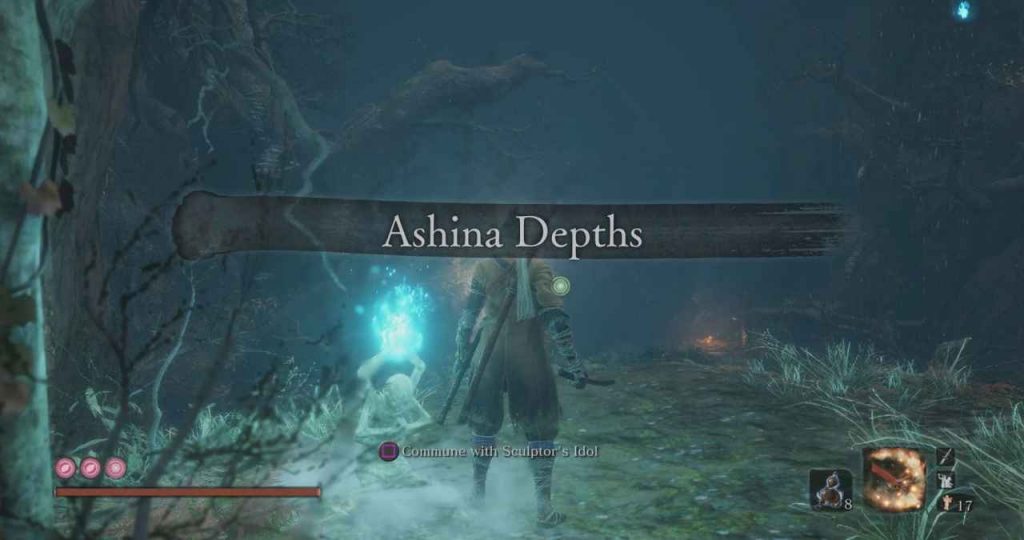
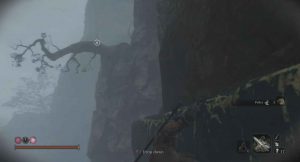
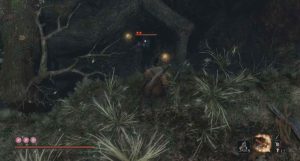
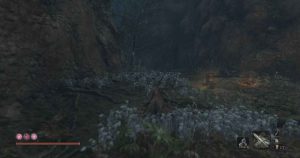
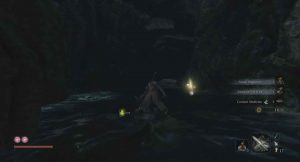
The Ashina Depths is a long area with some hard fights. It can be accessed from the Sunken Valley and the Abandoned Dungeon in Sekiro: Shadows Die Twice. This walkthrough will show you all of the items, enemies and every hidden secret.
Ashina Depths – Poison Pool
We are going to start off from the Poison Pool Idol which is accessed from the Riven Cove Idol in the Sunken Valley. The reason for this is that this first area is much easier to complete from here.
If you head up the rocks next to the idol, you can kill the enemy with a cannon from stealth. Next to him, you can pick-up some Oil.
Head back down to the Idol. The swamp here is poisonous. Head through it and pick-up a Pellet on the rock ahead.
Now, on the rocks ahead of that, you can pick-up some Black Gunpowder and some Scrap Magnetite. Around the corner, behind the statue’s head, you can find a mini-boss: Snake Eyes Sirahagi. This is the same mini-boss as the one in the Sunken Valley.
You want to wait until the patrolling Cannon enemy on the middle landmass has his back to her. The safest bet is to fight her back behind the statue’s head. If you can, get her to follow you back towards the Idol do that. This will allow you to not get hit by any of the cannons.
You may even be able to perform a Stealth deathblow behind by sneaking up behind her.
She is quite difficult as her attacks are relentless, meaning she can easily break your posture. Bring the Firecrackers Shinobi Tool with you.
If she spins with the weapon behind her and the Perilous symbol appears, you want to jump back and out of the way as this is a grab attack.
If she kicks you, she will follow up with a shot from her gun, which can be dodged by stepping to the right. She can also fire her weapon at any point. This can be dodged or blocked. I prefer to block it as it can be a little unpredictable.
Any swings with her weapon can be deflected.
The key thing with her is to attack when she is finishing up an attack. Thereby, you can decrease her posture. This fight took me a while to get down. Use your firecrackers quite a bit to get her to stop attacking.
Once she is dead you will get a Prayer Bed.
Now, kill the Cannon enemy on the centre landmass. Up top, on the scaffolding to the left, you can find one more enemy.
On the central landmass, you can pick-up some Scrap Magnetite and a Mibu Possession Balloon. In the swamp, behind that landmass, you can pick-up a Heavy Coin Purse and some Yellow Gunpowder.
Up, on the hand of the statue, you can find some Scrap Magnetite. You can grapple up to that hand.
Now, above where the third cannon enemy was, you can find the other Sculptor’s Idol which was accessed from the Abandoned Dungeon.
Head on through the cave, just next to where the mini-boss was originally standing. Down this cave, you can speak with a wounded enemy. He will tell you about the enemy which killed him. Now, before we head down that path, we can access it from above.
If you look up to your left, you will see a grapple point. Jump and head up to it.
Along this path, you can find a monkey, as well as some Monkey Booze. If you look down, yep, it’s back. The Guardian Ape has returned.
You can see how to defeat it once and for all in our Boss Guide for the Guardian Ape. Once you defeat it, you will get the Memory: Headless Ape, which will upgrade your attack power. On top of that, you will get a Prayer Bead.
When you swing at the Ape’s jerking carcass you will sever its immortality and get the Bestowal Ninjitsu Skill. At the cost of Spirit Emblems, you can coat your blade in a victim’s blood, extending its reach.
In this arena, you can activate the Sculptor’s Idol. Above that is a grapple point. Head through the corridor and grapple up twice.
Outside, you can find two more Moonjar Enemies, although these have a grey hue to them. We will find out why a little later in this area. When you kill one of these enemies you will get a Yashariku’s Sugar, which will massively increase your attack power at the cost of halving your max vitality and posture.
Jump across the gap and interact with the Sculptor’s Idol.
Ashina Depths – Hidden Forest
The Hidden Forest is a unique part of the game that features ghost versions of the human enemies and wolves you have fought up until now. These enemies will only appear when you are close to them. This means that enemies can be hard to predict, due to them being invisible. Therefore, you are going to want to take this place slow and steady.
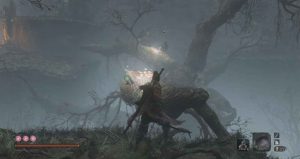
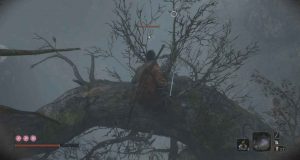
From the Idol, jump onto the first branch and hop down to the base of that tree to your left. If you loop around the base of the tree you can find one of the roosters on the other side.
In front of where that rooster was looking, you can find a Mibu Balloon of Wealth. Then walk across the branch to the right and kill the second rooster on said branch. A the end is a Ceramic Shard.
If you head across to the rock on the other side, you can talk to the man sat against the statue. Above him is a Pellet and a rooster. If you look up, you can grapple to another platform to get a Light Coin Purse and kill another horrifying rooster.
Now, we are going to explore the path beneath that second branch you crossed. Hop back on; and, if you look beneath you, you will see a couple of humans standing and walking around. Do a plunging Shinobi Deathblow on one and kill the other two. Here you can find a Pellet, Mibu Balloon of Wealth, and some Scrap Iron. If you head forward, you can find one more enemy sitting down, which you can kill with a Shinobi Deathblow.
Just past him, you will see a Headless mini-boss, with some items on the ground. We are going to leave that guy until a little bit later.
A couple more enemies will likely spawn in the path you are on, take them out as quickly as you can. Head behind the tree you jumped off of and kill the enemy sitting down at the base.
If you head up this hill on the left, you will find some Scrap Magnetite and three more enemies. The hop down to the lower path to find some more enemies, four to be exact.
Down here you can find an alternate path to the Headless; but, as I said we will come back here later.
Now, head back to the man and cross the tree branch to progress. Along this path, you can find two more terrifying roosters.
This next area is large and has a lot of enemies, including some very annoying archers. We are first going to focus on the right-hand side. If you stick to the right side of the cliff you sneak up behind the enemy in-front of you. Continue along to find three more enemies and a Bite Down just above them. Below that level, underneath some trees is another grunt.
Head back to the tree branch at the start of this section. The Cliff to the left, we are going to want to jump up the wall and onto it. Now, the timing and positioning for this is tricky and takes a lot of tries.
You want to run from the tree to the cliff, jump off of the wall slightly before and hop onto the ledge barely. This will take a while; but, just keep trying and you will get it. Up here, you can pick-up some Adamantite Scrap. You can also kill the archer up here. The raised rock in-front of where that archer was looking has another archer on it. Hop over and kill him.
Return to the right side where you killed the three grunts. Just ahead, in-front of the hut you can find two wolves, a grunt overlooking the land, and another watching the door to the building.
From there, head back to the raised rock where you killed the archer. Beneath you, you can find five wolves and a grunt, with a Yellow Gunpowder below where you killed the first archer and a Bite Down, Light Coin Purse, and a Contact Medicine where the grunt and his wolves were.
Before we head up to the left and backwards, head back to the front of the hut and continue along the left side of it. Here you can find a couple of enemies on the corner of the building. Just by a light you can pick-up some Oil.
Continue along the path to find a couple more enemies, along with some more Oil. Just ahead you can pick-up some White Spirit Emblems, with some more even further along.
Below there are a couple more enemies. In the middle of this area, you can pick-up some Ceramic Shards.
Now, head backwards and stick to the wall on your right. Up above, you will see a branch to grapple to about half-way along.
Head up and hug the wall on the left. Up here, you can collect some Snap Seeds. Now, head back down and take the other path.
In here you have some monkeys sat next to a mini-boss, along with a gunner up on the right. The gunner will spot you and cause the monkeys to hop up next to you. If you head all the way back to the tree branch at the beginning of this section. The mini-boss will lose sight of you and go back to his starting position.
Now, head back and grapple up to the right and onto the platform across the way.
From here you will be able to perform a jumping Shinobi deathblow on the mini-boss, taking down one of his healthbars. Now, Tokujiro the Glutton is the exact same as the Drunkard in the Hirata Estate.
His anytime he crouches he is about to do a Grab attack, which should be dodged by moving backwards. You can get a hit in after he does his longer grab. Deflect any sword attacks. Dodge his poison breath. Jump over his Perilous Sweeping attack. Finally, get some hits in when he is recovering from attacks. Overall, he is not a tough fight.
Beating him will give you an Unrefined Sake and a Prayer Bead. By the fire, where he was standing, you can pick-up a Fistful of Ash.
Head through the opening and jump across to pick up the Pellet on the ledge.
To your left, you will see a branch which you can grapple to.
Head along the path and grapple to the top ledge to find a Lump of Fat Wax. Grapple across to the branch and then the rooftop of the hut to find an entrance to the building. Fall onto the beam and lock on to the mini-boss below.
This is the Mist Noble and he is the easiest boss you will face in the game. Do a Stealth Deathblow on him by jumping to take off one of his healthbars. When he stands back up, back away until he finishes his grab attack and then head in and hit him five-seven times to kill him. When you kill him a puff of smoke will emerge from the area and you will get a Lump of Grave Wax, which is used for Prosthetic Tool Upgrades.
That puff of smoke will have destroyed the hut you are in and removed all of the silver enemies we have been fighting in this area. This makes it a breeze to run through now. Next to the opening in the hut, you can find some Yashariku’s Sugar. In a hole in the ground, you can find a Heavy Coin Purse.
Now, we are going to fight the Headless enemy. It is now easier to see down in that area. You will need two Divine Confetti and at least three Pacifying Agents. Apply both before you jump down and jump onto the enemy from the platform with the man on. You may get lucky and be able to perform a deathblow. If not you will have to fight it normally.
Any normal swings can be deflected. When he does his 360-degree sweep he will disappear. You want to turn around as soon as he starts to disappear to prevent him from performing a grab attack from behind you. If you do this correctly and the Perilous symbol does not show up you can get a good few hits in on him.
You will need to apply another Divine Confetti for the second healthbar. Reapply your Pacifying Agent every 40-50 seconds. If you think you are going to die, you can quickly shut down your game to prevent yourself from losing your Divine Confetti’s and Pacifying Agent’s.
You will likely take some hits and may even die. However, just resurrect. After a try or two, you will get him. Once you defeat him you will get Gachiin’s Spiritfall, which will make you harder to detect at the cost of Spirit Emblems. On the floor, where the headless was standing, you can pick-up a Lump of Fat Wax and some Scrap Magnetite.
Once that is done, head back behind the hut you fought the mini-boss in. A new path has now opened up ahead.
To the left, you can collect some Pellets. Just ahead are two Moonjar enemies. Attack the first one on the branch and do the same for the second one. Continue on down to the Sculpter’s Idol at the bottom.
Ashina Depths – Mibu Village
Just to the right of the Idol, you can find a Memorial Mob Shop. Here you can pick up a Mottled Purple Gourd. This refills upon resting, increases Terror Resistance, and reduces Terror Buildup. You can also buy two Treasure Carp Scales from him to use in the Hirata Estate.
If you head up the river, you can see one of the purple dudes. This isn’t a mini-boss; however, he is still difficult. His multiple kick attack should be deflected; however when the perilous symbol pops up dodge to the right twice and get some hits in.
If he punches with his right fist he will inflict poison. He can follow this up with three more hits that deal poison. So, you will want to dodge out of the way.
After his side uppercut, he can perform a sweep attack, You will want to jump over that. You will also want to dodge to the right a couple of times when he jumps in the air. Any other attacks should be deflected. Try to get some attacks in whilst he is recovering from attacks. Once you have defeated him, you will get some Scrap Magnetite. Down that path, you can get a Treasure Carp Scale.
If you head up the top of the cliff on the left and hop down, you can find a Lump of Fat Wax behind the hut ahead. If you head around the right of the hut ahead of that, you can stealth kill one of the villagers on the left. Just ahead are two more villagers. They are really easy to defeat, just swing a few times.
The trick here is that these villagers will continuously spawn from the ground for a while until you kill them all. Once you find their spawn point, you can just keep swinging until they are all dead. Now, you will enter the Mibu Village.
Ahead you will see another large group of villagers to take out. By the first small hut you pass, you can pick-up a Mibu Balloon of Soul against the water.
If you then look at the first larger hut along the main path you can grapple up to a tree and then hop onto the roof. Jump inside the building, through the hole.
In here you can talk to Basket Wearer Shosuke. He offers up a bit of lore and that is it.
Grapple back out of the house and kill the enemies on the left side of the house. On the ground, in the grass, you can pick-up some Pacifying Agents.
Head down, between the two large houses and kill the enemies by the waterfront. When they are dead, you can find a Mibu Balloon of Wealth on the boat. If you hop into the hole in the roof of the second large house you can find some Fistful of Ash. you will also have to fight a few more enemies when jumping back out.
Don’t go up the left path yet. Instead, head along the middle path and take on the large group of enemies by the tree. Here, some enemies will spawn from the ground and grab you. They will hold you and let the other enemies attack you. You can break out of their grab with the R1 and L1 buttons. Take a swing at them once you do to kill them. The best bet to take them out is to block and retreat if you get overwhelmed.
You will likely get the attention of the large enemy with a bell. Try to get him to patrol over to where you just fought those enemies. Hide until he loses your attention and then stealth behind him for an easy kill.
Now, we are going to pick up the items scattered around this small area now. On the right, you can find some Black Gunpowder. By the tree is a Gourd Seed and a Mibu Balloon of Soul. If you hop down to the lower path to the left of that tree you can pick-up a Pellet.
Grapple up to the house on the right and kill the enemy overlooking the area you just passed through. Stay on the roof and hop up to the planks above. You can pick-up a Pellet. Now head down and inside the house to kill two more enemies, another will enter shortly after killing the first. Inside here you can pick-up some Divine Confetti and some Yellow Gunpowder. Head outside and down the stairs on the right to find a Mibu Balloon of Soul.
Now we are going to take on the left hill of enemies we avoided earlier. If you head through the house and out the other side you can grapple to this ledge shown below.
The tactic here is to kill a couple of enemies, hop back over to the position above, wait for them to lose sight of you and return to their original positions, and repeat. This allows you to easily take on this large horde without feeling overwhelmed.
I recommend leaving the big enemy for last and sneaking up behind him. Halfway up this hill you can pick-up a Contact Medicine. At the top, you can find an Ashina Sake. There is a grapple point above, you can find some Adamantine Scrap up there.
Go back through the house and interact with the Sculptor’s Idol ahead.
Ashina Depths – Water Mill
Before we head onwards, we want to hop over the rock on your right. If you stick to the right, you can find a Pellet on a boat in the water.
This area is a trap. Once you reach the ladder at the bottom, a bunch of enemies will spawn out of the ground including a couple of the large bell-wielding enemies. Before they do though, you can find a Contact Medicine behind the hut on the lower level, on the right. You can find a Fistful of Ash along the main path.
Now, climb on the building and immediately turn around and run away to the top level of this path. Most of the enemies will follow you. Run back down and kill the couple of stragglers by the ladder. Now, sneak up the left side behind the hut. Enemies will spawn here. But, you can cut them down easily.
Head back up to the top and wait for the enemies to lose you. From here on out, just run down and kill a couple of enemies, run back to the top and repeat until they are all dead.
Upon the building with the ladder, you can find some Adamantite Scrap and a Pine Resin Ember. The latter will allow you to upgrade a later variant of the Flame Vent Prosthetic Tool.
Turn around and grapple to the point just above. At the end of this path and across the gap, you can find a Mibu Balloon of Soul.
Now, head back to the Idol. Hop in the water to the left and swim to the waterfall at the end. Here you can pick-up a Divine Grass from the chest.
If you continue up the main path from the idol you will come across a crying woman. If you talk to her, you can choose an option. No matter what happens, she will engage you in combat.
This mini-boss, O’Rin of the Water, is a tough fight. For the most part, you want to be deflecting her standard sword attack and attacking only when she is recovering from an attack.
If she is far away from you, she will do a five hit combo which you can deflect. At the end of that combo, she might initiate a Perilous sweeping attack. You can jump over it or hit her to stun her out of it. I recommend doing the former, as it can be hard to hit her early enough.
She can also jump in the air and glide towards you, swiping a few times. Deflect these and then jump over the sweeping attack she follows up with.
Overall, this fight is about constantly staying on her and either deflecting or attacking to ensure her posture does not recover. You rarely get time to deal damage so deflecting will be your main tactic.
Once you defeat her you will get a Prayer Bead and the Breath of Life: Shadow Latent Skill which will recover Vitality upon performing a deathblow.
Before you head across the bridge, head to the right and pick up the Lump of Fat Wax.
As you head across the bridge you will be blocked by an enemy. Now, this guy is actually a copy of the Katana enemies you find in Ashina Castle. You will want to use a mixture of blocks and deflects. If he does the Perilous thrust attack, use your Miriki Counter as it fills his posture bar by about two thirds.
If you head up the path, you will notice a whole bunch of enemies listening to what is going on behind the door. Don’t go up the left path yet. You want to sneak up behind the large enemy with the bell. He will stand up when you get close; but, you can still kill him before he turns around. Now, kill the rest of the enemies in regular combat.
You can eavesdrop on what is happening inside. Now, if you sneak under the temple through the opening on the right, you will reach be able to interact with a hidden wall, on the bottom of the temple floor. This will take you inside the temple. In the corner, you can talk to the Man. To the left, behind some pots, is a Red Lump. You can collect some Divine Confetti from the centre of this room. Head out the open door and turn left. Here you can pick-up some Adamantite Scrap.
Now, grapple up to the second floor of the temple. Inside you can find a Prayer Bead and some White Spirit Emblems.
Then, cross to the building on the other side to find a Light Coin Purse.
From there, head back to the front of the temple and up the left path. This will take you to the Corrupted Monk Boss Fight. You can read our Boss Guide for the Corrupted Monk on how to beat him.
Once you do defeat him, you will get the Memory: Corrupted Monk, which can be used to upgrade your attack power. You will also get the Mibu Breathing Technique Latent Skill which will allow you to dive underwater. Just ahead is a Sculptor’s Idol.
Ashina Depths – Wedding Cave Door
If you head down the door from the Idol you will see an altar in the middle of the room. Here you can pick-up the Shelter Stone, which is another ingredient Kuro wants. Here you can read the altar it was on. You can also go up to the Palanquin on the hill; however, you can’t do anything with it right now.
Before we head back to Kuro. You want to travel to the Poison Pool Idol in the Ashina Depths as there is a new mini-boss in the arena where you fought the Guardian Ape earlier. This mini-boss is the exact same as the one you fight in the Abandoned Dungeon.
This mini-boss is a Shichimen Warrior, which deals terror damage. If any of his spirit orbs hit you, you will take Terror damage. Once it is full you will instantly die. You will want five Pacifying Agents and three Divine Confetti.
Before you engage, use a Confetti. This will allow you to damage him. Once in the arena, use the Pacifying Agent. You will want to refresh the Agent every thirty-to-forty seconds.
His orbs that he sends up are not too much of an issue. If he spins the spear in his hands and slams it on the ground, you want to run to the side to dodge the fireball.
If he disappears, he will teleport far away and shoot a Terror Beam at you. When he does this, just run to the side until he is finished.
Other than that, just reapply your Divine Confetti when it runs out. Attack as much as possible to lower his posture. You will kill him and he is not too much of an issue. If you want to practise with this type of enemy. Go and kill the one in the Abandoned Dungeon.
After you defeat him you will get Malcontent’s Ring, which can be used to upgrade your Finger Whistle Prosthetic Tool to a later variant.
Now you want to head back to Kuro’s Room. But, oh wait. All of the Idol’s in Ashina Castle are blocked off, except the Abandoned Dungeon Entrance. Therefore, we want to head there.
That cover’s it for the Ashina Depths. Our walkthrough of the Ashina Castle (Invaded) is now live. Check out all of our Sekiro coverage.
